Sunday, March 11, 2018

Fairy Magic

Spring hasn't quite arrived in my area yet, still lots of white snow on the ground, but we're all dreaming of green grass and flowers!

For years I have followed Finnabair and her amazing work and products.  I had the pleasure of spending an entire day learning from her a number of years ago!!  She really pushed me out of my comfort zone making me let loose with my creativity!

When I saw the February mood board at Mixed Media Place the green and trees made me even more anxious for spring to arrive!


I was so inspired I had to play along creating this mini 4x4 canvas
I added LOTS of texture to this little canvas.....yes I LOVE texture!
 
The Patina Effects & Rust Pastes added extra texture, along with Art Stones and mini beads!
I gave my fairy a tiny bit of sparkle using regular black embossing powder first, then adding some Black Soot Distress embossing powder on top.

Thank you for stopping by!  Be sure to hop over to Mixed Media Place and see all the amazing artwork by the Team and people playing along with the challenge!


Monday, March 5, 2018

A Fine Gentleman

It's time to come out of the woodwork and start sharing my creativity again....here goes!

During my creative break I continued to follow blogs & social media admiring all the creativeness out there!

One of the great challenge blogs I've been 'lurking' on is SanDee & Amelie's Steampunk Challenges.  What can I say, these artists have created a blog that caters to my favorite style that I just can't get enough of!!  

Here is my Fine Gentleman mixed media canvas......hopefully my first of many entries!

I found this replica tin photo years ago and finally decided it was time to stop hoarding him and create a fitting piece of art for him.

He's kinda handsome and completely deserving of a close up don't you think? 

A couple more close ups to show off some of the details.  I used a variety of mediums on this project, including Finnabair Rust Paste, Paper Artsy Infusions and Tim Holtz Distress Crayons.


Thank you for stopping by & letting me share my canvas with you!  Be sure to check out the Steampunk Challenge blog.......I promise you won't be disappointed!


Sunday, February 25, 2018

Getting Back to Creativity


Sometimes life throws things at you that require your attention taking time away from hobbies and passions.  But eventually everything sorts itself out!!!

After quite the long break from creating I'm finally getting my groove back and it feels great!  I have missed playing and creating on a regular basis.

So to kick off my re-entry how about I share some photos of my 'new' (ok it's been finished for a while) space that my husband built for me in our refinished basement.

It's not a very big space as you can see, but I think I managed to organize and fit all my supplies into it fairly well!

The best part of my new space is the IKEA CD Tower that I had turned on it's side to store all my Tim Holtz Bigz dies!  They are right at my finger tips which I love!!

I have lots of light and lots of plugs, actually I have more plugs in this space than in my master bedroom! LOL  Best part of a small space EVERYTHING is within reach!

Now that I've shared my 'newish' space I can't wait to start sharing what I create with everyone again!

Saturday, October 4, 2014

World Card Making Day!!!

Hello & Happy World Card Making Day!!

Today we are celebrating World Card Making Day on Love Is In The Details blog!

Each member of the Design Team and the owner Lori have created a card and challenge for everyone to play along with.

Here's a quick little peek of my card...


I hope you take some time today to create some cards and joint us at the LIITD blog for some fun challenges and amazing inspiration!
 

Sunday, September 21, 2014

Fall Home Decor

It's a beautiful fall day here, the sun was out nice & warm, the leaves are changing color....my favorite season is here!

All the beautiful colors and the thought of Halloween just around the corner inspired me to create a little Fall/Halloween home decor project for my blog post at Love Is In The Details!


I picked up a cheap wood plaque from the dollar store and altered it into this fund fall/halloween inspired wall hanging.  I dug through my stash of Tim Holtz dies for this....also realized there are some that I don't have that would have been perfect for this project, time to shop!!

You can see more details including some close ups of this over at the Love Is In The Details Blog!!

Happy Sunday!

Sunday, September 7, 2014

Embark.......on creativitiy!

Over the last few months I took a little break from creating...and I'm happy to say that I'm back at it!  Over my holidays I spent an afternoon in Winkler visiting Lori at Love Is In The Details, fun times as always!  Of course I picked up some new goodies while I was there, so I pulled them out yesterday and spent the afternoon at my scrap table.


Here's a fun little tag I made using  the Perfect Airbrush Color Spritzer to create the background and Dina Wakely's Scribbly Bird stamp set.


I am in love with both products.....you can read more about the tag on the Love Is In The Details Blog!

We also have two new members on the Design Team, be sure to check the blog and see what Jodi & Jennifer have been busy creating!!

Have a great weekend!

Tuesday, August 5, 2014

Time to freshen up around here!

Well I have to say this blog is a sad state of affairs, full of cobwebs & tumbleweeds.  Seriously it's been almost a year since I posted last...yes I'll be the first to admit that is pathetic!

Time to freshen up around here and get posting again.  I decided the ole blog needed a bit of a facelift, I wanted a brighter look...what do you think?

Since I have some catching up to do I better share something crafty....certainly no shortage of things to share there. ;)

How about a tag...yes a slow start but I think I should ease myself back into this blogging thing. LOL


If you ask me nothing gets the creative juices flowing like playing with some Tim Holtz products!!


Look at the texture on that feather with the crackle.....love!!


Well I have one more thing to dust off around here and that's my scrap table.  Work was getting pretty crazy, big deadlines...some stress so I've taken a bit of a break from scrapbooking.  But I'm on hoidays, took a little family camping vacation last week, had lots of sleep so I think it's time to get at that table and have some fun with my supplies!

I promise to be back soon to share some more projects!

Friday, September 20, 2013

Die-Namites New Release Blog Hop!!!

Welcome to our NEW RELEASE BLOG HOP Die~Namites Dies has just released 32 new Fall and Christmas themed dies!


We are sooo HAPPY that you have chosen to join us for the event, September 20-22, 2013
Our theme is...

“It’s beginning to look A LOT LIKE CHRISTMAS!”
 
As you are hopping along be sure to
leave a little love on each of the Design Team blogs.
Make sure to leave a comment on the Die~Namites Blog for an entry to win the Grand Prize of a
$50 Gift Certificate to Die~Namites Dies along with
5 ~ $10 Gift Certificates.
You will receive additional entries for Liking us on Facebook,
Signing up for Email Notifications.
So Let the HOP Begin
 
So enough about the logistics.... LET THE HOP BEGIN.... 

I'm so excited for the Blog Hop and all the new dies!!  Christmas is my favorite holiday, all the decorations & twinkly lights make me so happy.

December is the busiest month in my house with 2 kids celebrating birthdays, hockey in full swing and of course all the holiday festivities, so this year I'm trying to get a jump start on some Christmas projects. I was thrilled when it was announced our theme for the blog hop was Christmas, and decided to make something special for my Mom using the Pinecone and Elegant Holly dies.


I had  this plain wood frame that I picked up ages ago from the dollar store and this old photo of the kids with Santa & Mrs Claus.  I'd forgotten how little they all were once upon a time!

I didn't like the plain wood of the frame so I stained it using Vintage Photo Distress Stain, so quick and easy!


I added a few layers of pattern paper and the photo to the centre, then decorated the corners with the dies.
I cut the Elegant Holly die twice from green cardstock, then added some Distress Stickles in Forest Moss & Fired Brick to had a touch of shimmer to the die cuts.

 
For the top corner I cut the Pinecone die first from glitter cardstock, then did a second cut using the same green as the holly, finishing them off with some crinkle ribbon.

Here's a closer look at the Pinecone so you can see how pretty it looks cut from the glitter cardstock.


Now head on over to Taniesa’s blog. 
THANK YOU FOR HOPIN’ ALONG WITH US!

Thursday, September 19, 2013

Another Die-Namite Card

Just a quick post today to share a card I made for Die-Namites using the Butterfly Wreath die.


I really wanted to show off this beautiful die and make it the focal point of the card, so I kept all the other papers on the card neutral allowing it to pop!


You can see more details on the Die-Namites Blog.

Before I go we are having some fun on the blog tomorrow with another Blog Hop..woohoo!!!


Oh and here's a tiny little peek of the project I made for the blog hop.
 

 That's all for today, see you tomorrow!!


Wednesday, September 11, 2013

Memories of Banff

Happy Hump Day!!

Today I have a layout to share which I created using Die-Namites Dies!

As a mother of two boys I like many find it hard to make things work on boy pages...but I also like the challenge of taking something feminine and making it work.

On my layout I paired the Butterfly Wreath with it's flowers & butterflies with Knobby Branch which is more neutral.


 Here is the page I created using some photos from our summer trip last year to Banff, AB Canada!


You can read more about this page on the Die-Namites Dies Blog.

I hope you have a great day and take some time to enjoy the warm weather while it's still here!

Tuesday, September 3, 2013

Die~Namite Wedding

One more day and the kids go back to school...please tell me I'm not the only parent ready for this! LOL

Yesterday our inaugural Monthly Sketch and Dare Challenge was introduced on the Die-Namites Blog.


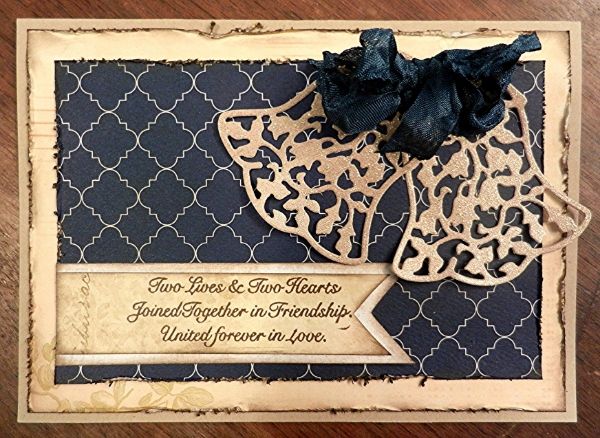
I used the sketch as inspiration for this wedding card I created using the Tulip Serenade Die.


When I first received this die I was holding it upside down and thought what a beautiful bell...I soon realized that's not what it was meant to be, but hey I like to break the rules a bit!


You can see more about this card on the Die-Namites Blog!

I'm off to get the kids ready for school, have a great day!

Friday, August 9, 2013

It's a Blog Hop Party with Die-Namites!!!

Welcome to the “Premiere” Die~Namites Dies Blog Hop.


We are so happy that you have chosen to join us!!!

Our blog hop will be from August 9th ~ August 11th.

Along the way, you will see creations by our

Die~Namite Design Team using the LATEST release


The Die~Namites Design Team Members will be sharing with you

how they made their pieces through

video and picture tutorials.

Each of the Die~Namites Design Team Members

will have a secret word.....on their blogs.

Collect all the words, make sure to leave a little love,

 to find the secret phrase

this will give you one entry into our

prize drawing.

You will receive additional entries for

Liking us on Facebook

Signing up for Email Notifications.


We will be awarding one Grand Prize of a

$50 Gift Certificate to Die~Namites Dies and

5 ~ $10 Gift Certificates to Die~Namites Dies.

So enough about the logistics....

LET THE HOP BEGIN....


If you have arrived here from Peggy’s blog you are in the right place.

If you have just arrived in the midst of our Blog Hop

please head to the Die~Namites Blog.


Hope you enjoy the “Premiere” Die~Namites Dies Blog Hop!!!


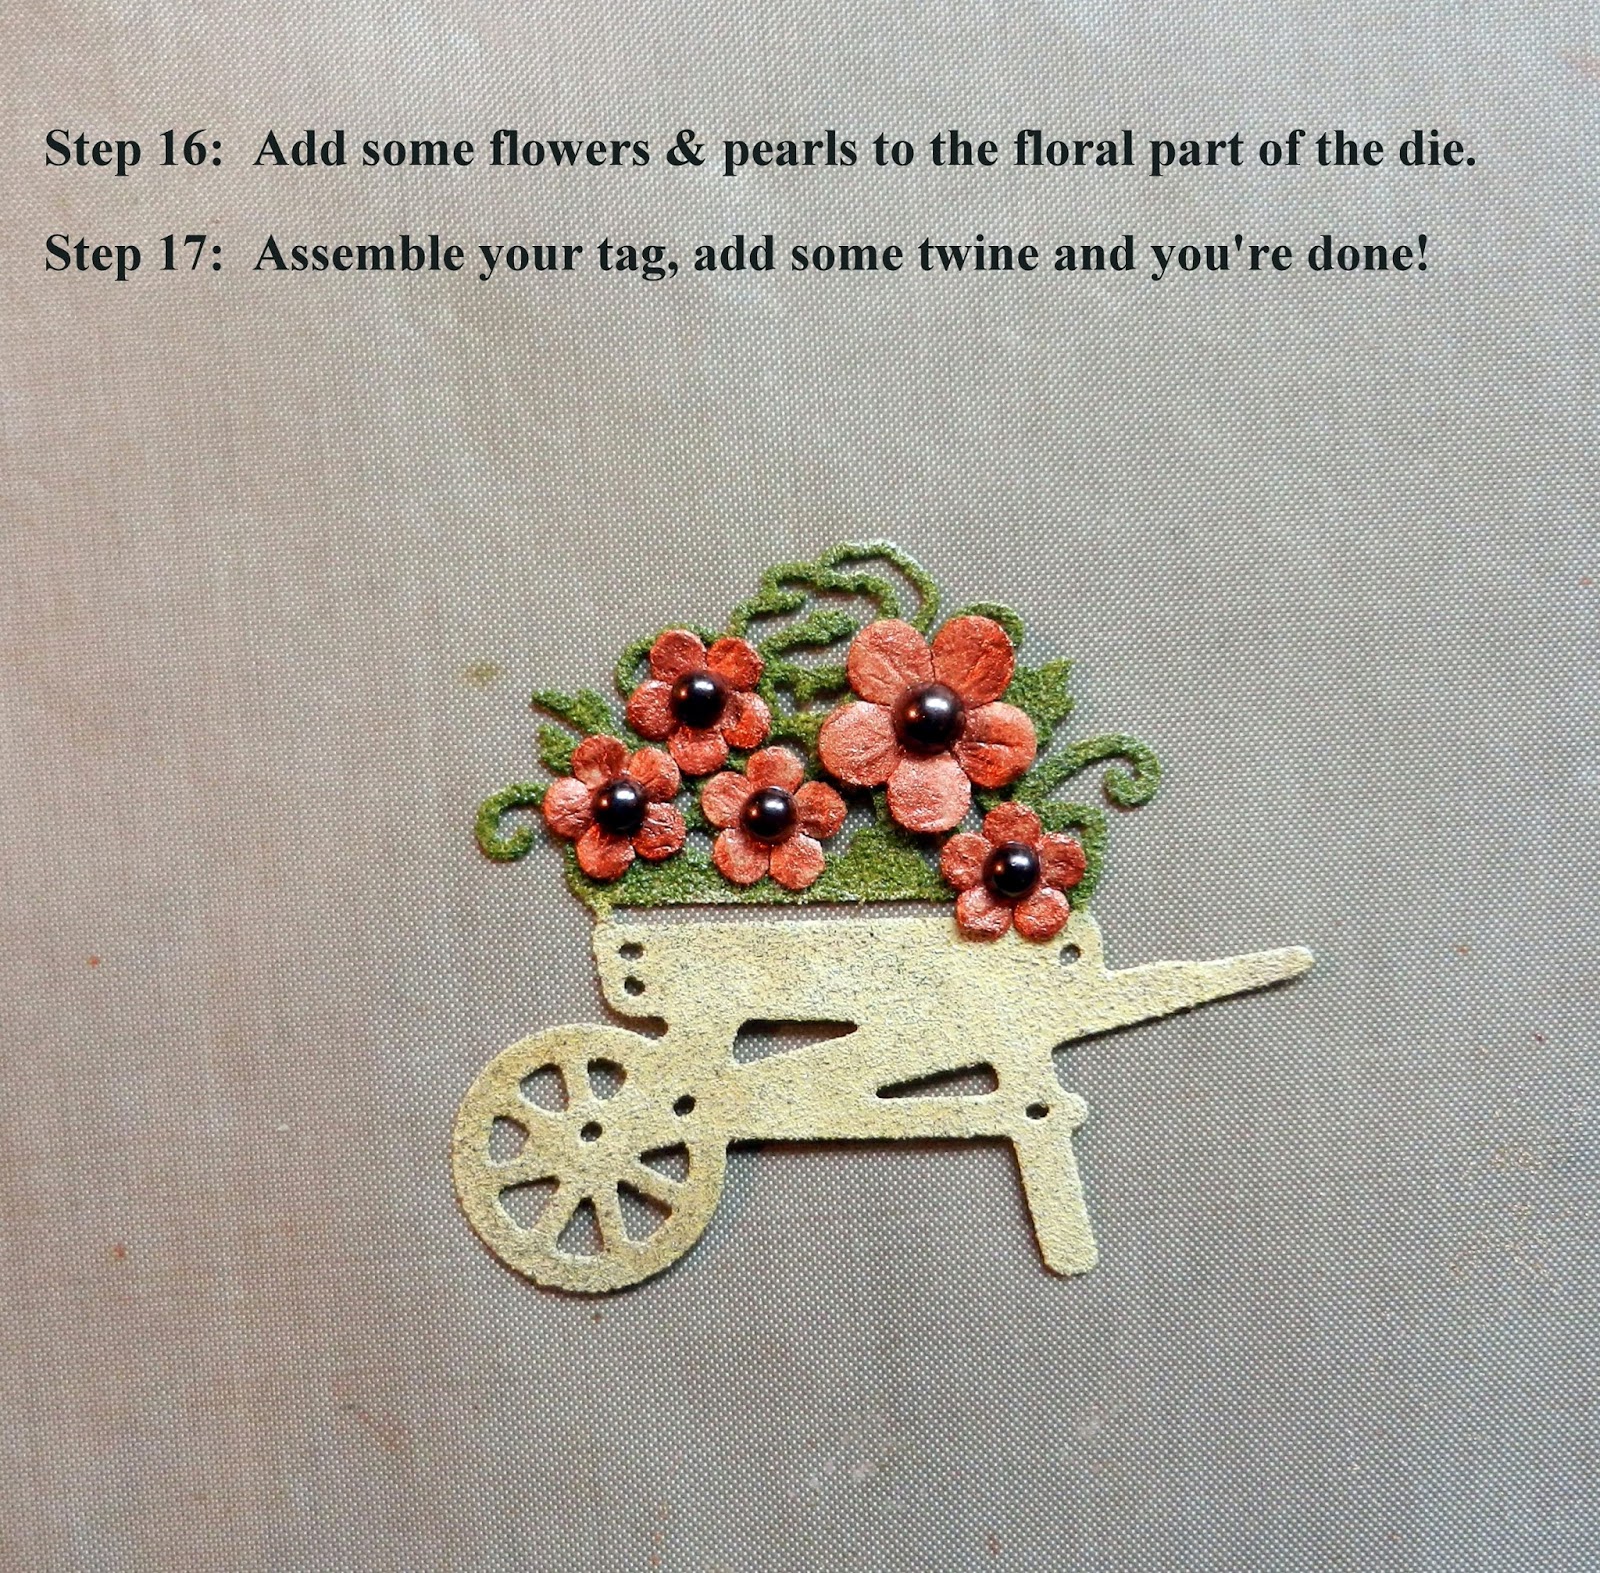
 Today I have a photo tutorial showing you how I made a tag using the Cattails & Floral Wheelbarrow dies.


Here is the finished tag, I love how all the pieces work so well together!


I love the texture the Distress Embossing Powder added to the Floral Wheelbarrow.
 The Distress Stickles added that finished touch to highlight the tops of the Cattails.


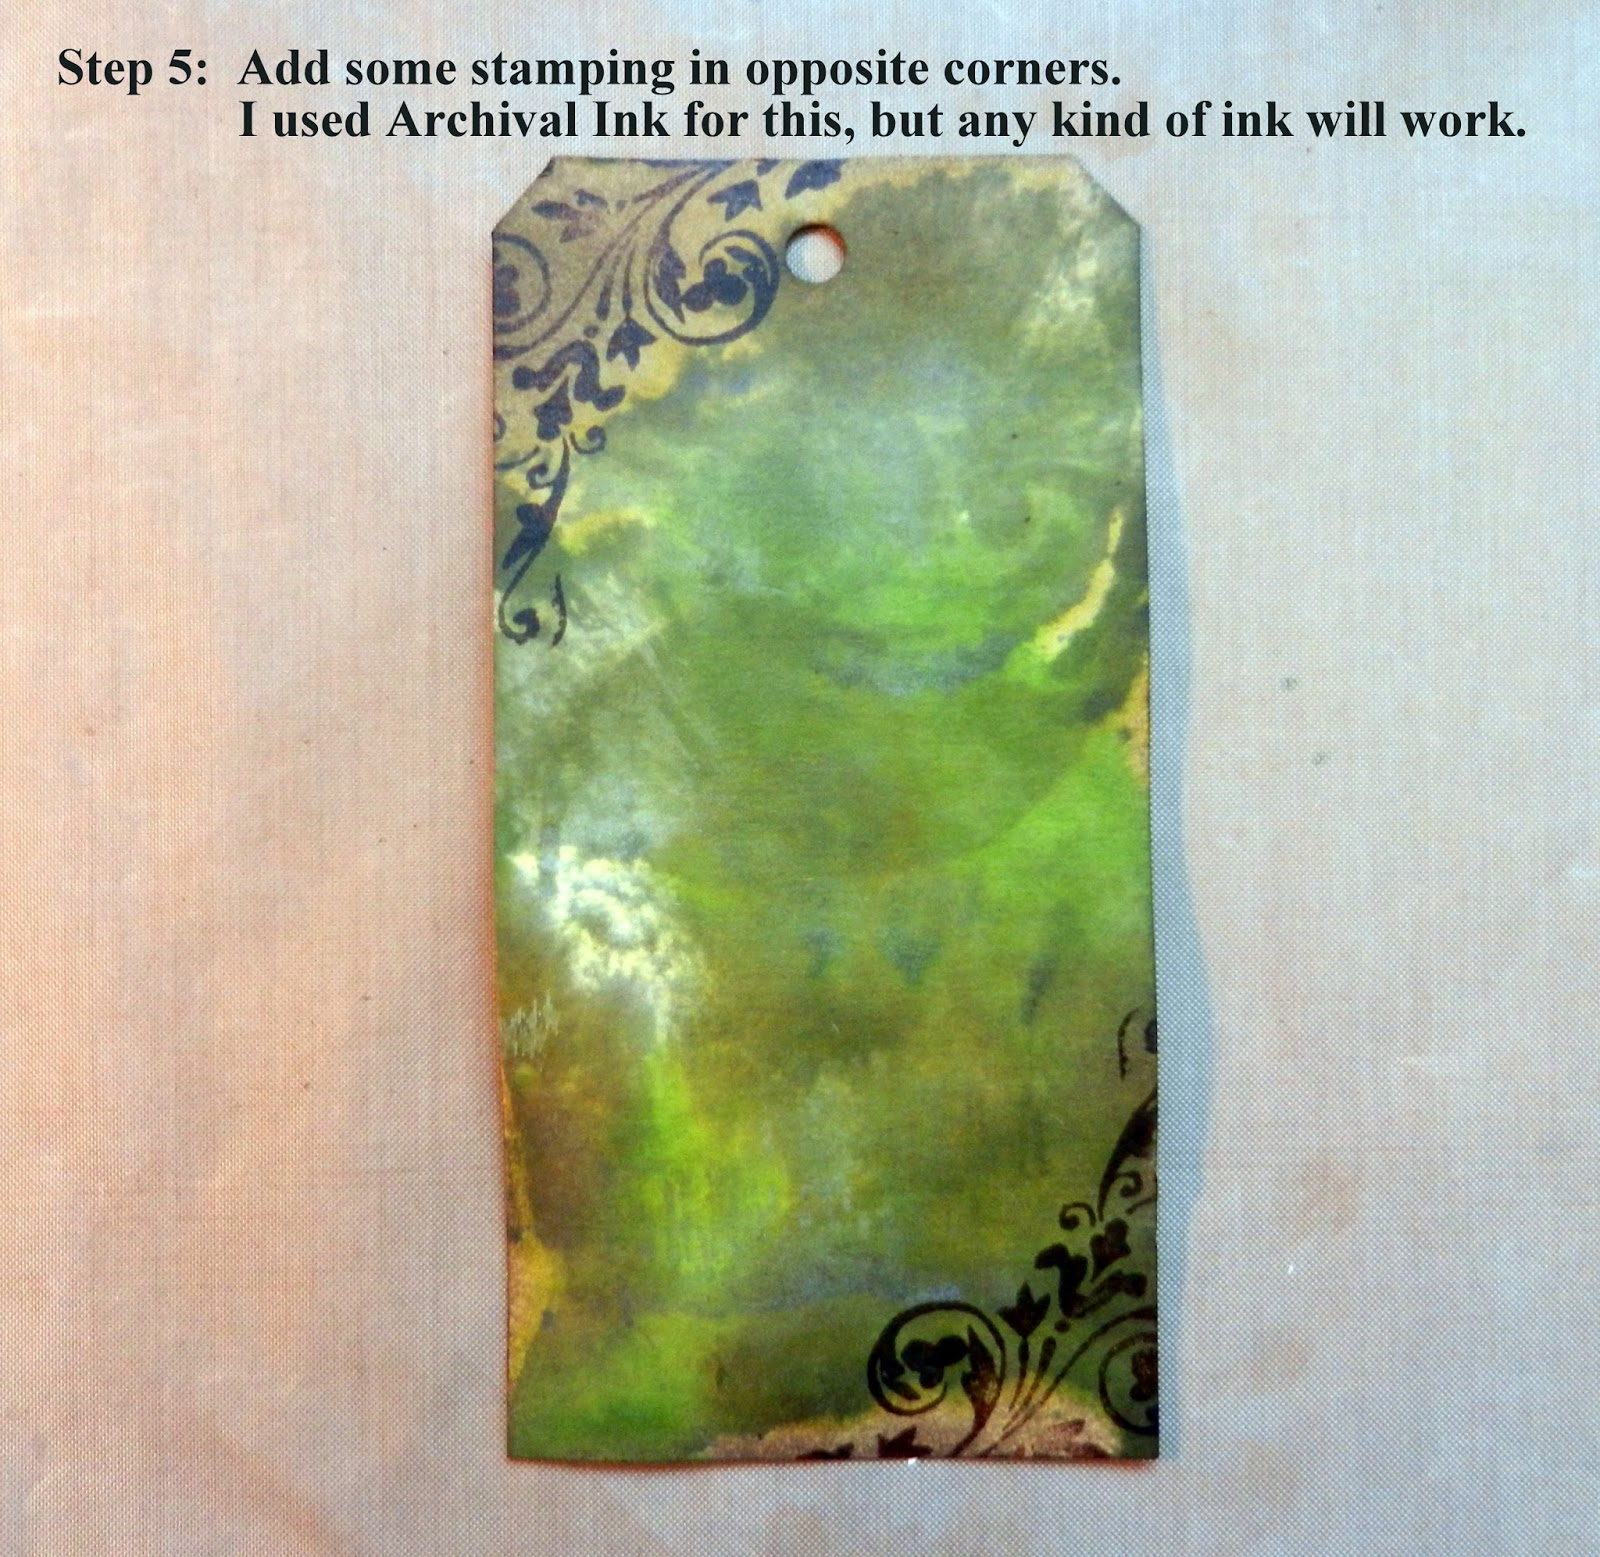
So let's get started, all the steps are included right on the photos...enjoy!


I hope you enjoyed my tag tutorial and it gave you some inspiration to get creative...after you've finished the blog hop of course!


My secret word is: COMES


Now head on over to Taniesa’s blog to continue the

“Premiere” Die~Namites Blog Hop!!